How to Attach Wood to Metal
Whether you’re DIYing an outdoor patio, assembling metal-framed furniture, or securing wooden accessories for industrial equipment, this guide will teach you how to choose the safest and most durable wood-to-metal connection solutions based on your specific scenario (load-bearing needs / aesthetic requirements / outdoor environment), helping you easily achieve a strong and durable connection between wood and metal.
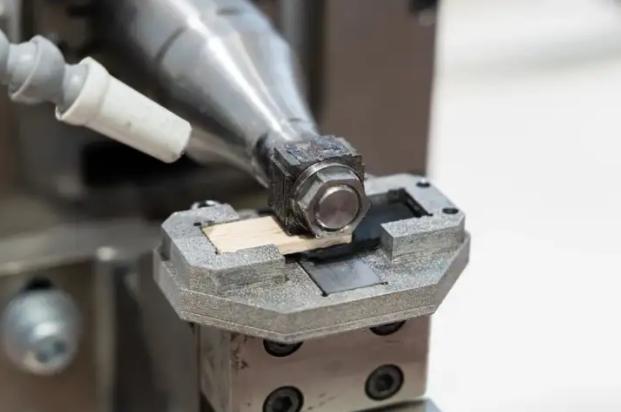
Table of Contents
Part 1. Challenges of Attaching Wood to Metal
How do you attach wood to metal? To effectively attach wood to metal, it’s important to first understand the challenges involved.
Because wood expands and contracts with humidity (especially across the grain), while metal expands and contracts primarily with temperature. If you fasten them too rigidly without accounting for this movement, the wood may crack, the screws may loosen, or the joint may fail over time. Understanding this helps you choose the right method and avoid common failures.
As a result, selecting the right materials and methods is crucial to creating a strong, durable bond that can withstand these varying conditions.
Part 2. 3 Ways to Attach Wood to Metal
Way 1. Screw and Bolt Connection
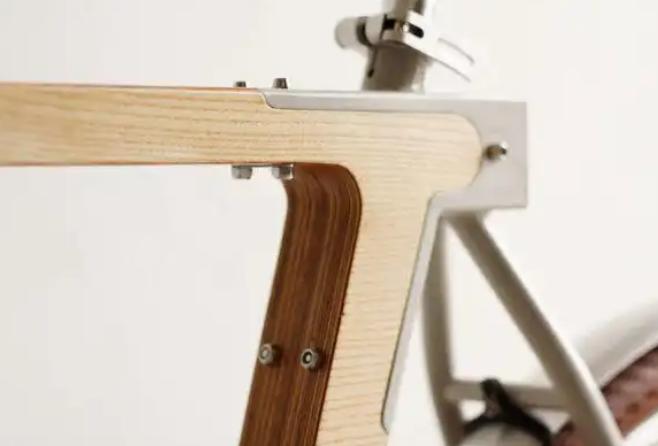
Screws and bolts are among the most common and convenient methods for fastening wood to metal, providing a strong and durable connection. They ensure a secure and lasting bond, making them suitable for a wide range of applications, especially those requiring significant weight and pressure support.

Here are the steps:
Step 1. Select Appropriate Screws or Bolts
Choose screws or bolts that are the right size for your project. The length and diameter of the screw or bolt should be sufficient to penetrate the wood and securely fasten to the metal surface.
Bolts are generally used for thicker metals or when a stronger connection is needed, while screws are suitable for lighter applications.
Quick selection guide:
- For metal thinner than 1.5mm: Use self-tapping screws with a sharp point.
- For metal between 1.5mm and 3mm: Use self-drilling screws (no pre-drilling needed) or standard screws with a pre-drilled pilot hole.
- For metal thicker than 3mm: Use machine screws + nuts, or drill and tap the metal for standard bolts.
KENENG Screws & Bolts Manufacturer
KENENG is a professional fastener manufacturer offering a wide range of high-quality fasteners to ensure the long-term stability of your projects in various environments. Whether you’re working on DIY home projects or large-scale engineering endeavors, it can provide reliable solutions tailored to your needs.
Step 2. Drill Holes
Use an electric drill or manual drill to make holes in both the wood and metal. It is important that the hole in the metal is slightly smaller than the diameter of the screw or bolt to ensure a tight fit, while the hole in the wood should be slightly larger to allow for adjustments and to prevent the wood from cracking.
Hole size reference (metric example):
If you are using an M5 screw (5mm outer diameter), drill the metal hole with a 4.2mm or 4.5mm drill bit. Drill the wood hole with a 5.5mm or 6mm drill bit. This allows the screw threads to bite the metal while passing freely through the wood.
Step 3. Install Screws or Bolts
Insert the screws or bolts through the wood and into the metal holes. Use a wrench, screwdriver, or power tool to tighten them securely. Ensure that the screws or bolts are firmly fastened to avoid any looseness.
Tip for avoiding over-tightening:
Stop tightening as soon as the screw head or washer makes firm contact with the wood surface and does not spin freely. For hardwoods, an extra quarter turn is usually enough. Over-tightening can crush the wood fibers and actually reduce holding power.
Step 4. Check the Connection
After installing the screws or bolts, check the stability of the connection to ensure there is no movement between the wood and metal. If needed, use lock nuts or washers to further secure the joint.
Suitable Applications: This method is ideal for furniture, construction structures, machinery, and other applications where a significant load or pressure is expected, especially for long-term use.
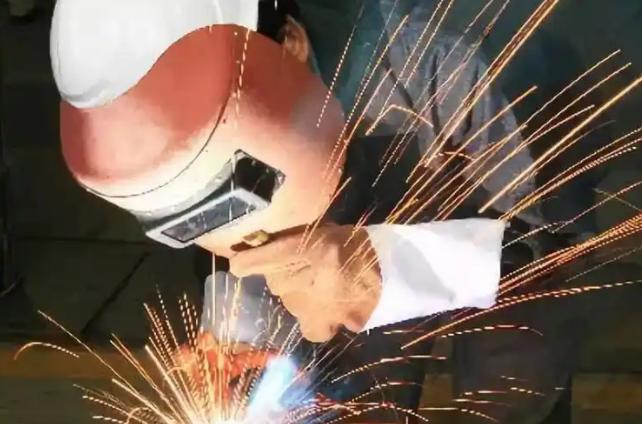
Way 2. Welding
Welding is another powerful method for connecting wood to metal, especially suited for situations where a high-strength bond is required. It is commonly used in large-scale construction projects and industrial applications, where the materials need to withstand high stress or extreme conditions.
How welding actually works for wood-to-metal:
Wood itself cannot be welded directly to metal. In practice, “welding” means you first weld metal brackets, plates, or tabs onto the metal structure. Then you attach the wood to those welded-on metal parts using screws or bolts. This gives you the strength of a welded metal frame with the ability to mount wood securely.
Welding involves heating metal components to their melting point to form a strong bond, with the metal fused onto the wood at the connection point.
Here are the steps:
Step 1. Preparation
Before welding, ensure that the areas to be welded are clean and free from oil, rust, or dirt. This step is crucial, as any contaminants can weaken the weld and affect its quality.
Step 2. Choose Welding Materials
Select appropriate welding materials based on the type and thickness of the metal being connected. For wood-metal connections, welding rods or wires are commonly used, along with a welding machine to perform the process.
Step 3. Heat and Weld
The molten metal is applied to the metal bracket or plate that will later hold the wood, not directly to the wood itself. After the welded bracket cools, you can drill mounting holes in it and attach the wood with screws or bolts.
Use a welding machine to apply high heat to the metal, causing it to melt. The molten metal should then be applied to the wood at the contact points. Ensure that the weld area is sufficiently heated and the materials bond effectively.
Step 4. Cooling and Inspection
Allow the weld to cool to room temperature. After welding, inspect the connection to check for any cracks or defects. If any issues are found, repair them as needed.
Suitable Applications: Welding is ideal for large engineering projects, industrial equipment, and applications where the connection will endure high temperatures or heavy loads.
When welding is worth the extra effort:
If your project involves heavy dynamic loads (machinery vibration, people walking on a platform, vehicle traffic) or extreme weather exposure, a welded metal subframe with bolted wood attachments is often the most durable long-term solution.
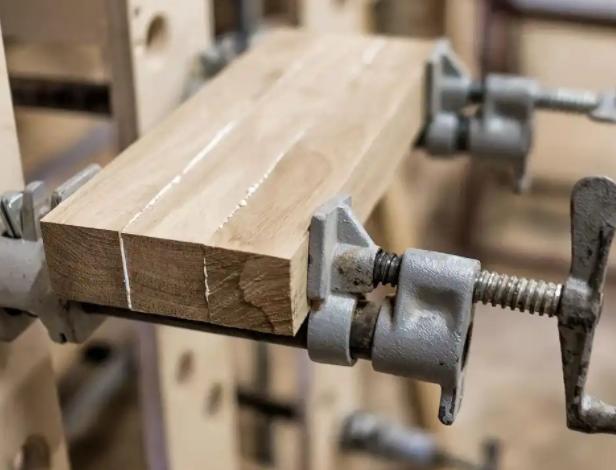
Way 3. Glue and Adhesive
For projects where you want to avoid drilling into the wood or need to maintain a clean aesthetic, glue and adhesives are the perfect solution. Specialized wood-to-metal adhesives provide a strong bond without damaging the wood surface. This method is ideal for lighter structures or non-load-bearing uses, typically for furniture, decorations, and other similar applications.
Which adhesives actually work for wood-to-metal?
Not all glues work. Standard white glue (PVA) or hot glue will fail quickly. The best choices are:
- Two-part epoxy: Strongest, water-resistant, works for both indoor and outdoor.
- Polyurethane glue (e.g., Gorilla Glue): Expands slightly to fill gaps, requires moisture to cure.
- Construction adhesive (liquid nails type): Good for larger surface areas but longer cure time.
Here are the steps:
Step 1. Surface Preparation
Clean both the wood and metal surfaces to ensure they are free from dust, oil, rust, or any other contaminants. You can use a cleaner to wipe down the surfaces, making sure they are dry and smooth to enhance the adhesive’s bonding effectiveness.
Critical tip for metal surfaces:
Smooth, shiny metal does not bond well with most adhesives. Lightly sand the metal surface with 80-120 grit sandpaper to create micro-scratches. This increases the bonding area and can improve adhesive strength by up to 300%. Then wipe away dust with rubbing alcohol or acetone
Step 2. Apply Adhesive
Apply an appropriate amount of adhesive evenly to the contact surfaces of the wood and metal. For stronger adhesives, you may use a spatula or brush to spread it evenly, ensuring all contact points are covered.
Step 3. Position and Secure
Align the wood and metal carefully and press them together. For best results, you can use clamps to hold the materials in place until the adhesive fully cures.
Step 4. Cure Time
Depending on the adhesive used, allow the bond to cure for the specified time, which could range from a few hours to 24 hours. Do not disturb the connection during this period to ensure a strong, permanent bond.
Suitable Applications: Glue and adhesive are ideal for furniture making, decorative projects, and applications that require an aesthetic finish, such as home decor, exhibition displays, and projects where heavy loads are not expected.
Load warning:
Do not rely on glue alone for structural joints like chair legs, shelf supports, or anything that bears human weight. Use screws or bolts for load-bearing connections, and use glue as a secondary helper.
Part 3. Useful Tips for Attaching Wood to Metal
1. Choosing the Right Materials
Wood and metal come in various types, and the characteristics and hardness of different materials determine the best connection method.
For example, when combining soft wood with hard metals, a stronger connection method (such as bolts or welding) may be necessary. On the other hand, for hardwood and soft metals, glue or screws can be used for fastening.
Material compatibility note:
Avoid direct contact between untreated carbon steel and acidic woods like oak, chestnut, or cedar. The wood’s natural acids accelerate rust. Use stainless steel fasteners or add a plastic/rubber barrier between the wood and metal.
2. The Importance of Surface Preparation
Whether you are using screws, welding, or adhesives, surface preparation is a crucial step to ensure a secure connection. If the wood surface has paint or stains, it may affect the adhesive’s bonding strength.
Similarly, rust or oil on the metal surface can impact the quality of the weld. Therefore, it is essential to ensure that both the wood and metal surfaces are clean and smooth. This is especially important when using adhesives, as the bonding surface needs to be thoroughly prepared.
3. Common Mistakes and How to Avoid Them
Mistake 1: Incorrect Hole Size
Some people may overlook the accuracy of drilling holes, resulting in holes that are either too large or too small.
This can prevent screws or bolts from being properly tightened. To avoid this, use the correct drill bit size and test the hole dimensions beforehand.
Mistake 2: Choosing the Wrong Adhesive
Not all types of glue are suitable for bonding wood and metal. Selecting a specially designed wood-to-metal adhesive can significantly improve the connection’s effectiveness.
Mistake 3: Over-tightening Screws
Over-tightening screws can damage the wood structure and lead to cracking. It’s important to tighten screws appropriately and use the right wrench to avoid excessive force.
Mistake 4: Using the wrong screw type for outdoor projects
Standard zinc-plated screws will rust within months outdoors. For exterior use, always choose stainless steel (304 or 316) or hot-dip galvanized fasteners.
Final Words
Attaching wood to metal isn’t too hard, but picking the right connection approach makes it all kind of lock in place so it stays strong, looks clean, and stays durable over time. Whether you decide on screws, welds, or adhesives, each option has its own good moments and specific know-how.
So, based on what your project actually requires, choose the most fitting fastening method to get that proper connection between wood and metal. If you want to use fasteners and need a dependable supplier, KENENG is your best choice.
