Rivet Nuts: How to Install and How to Uninstall
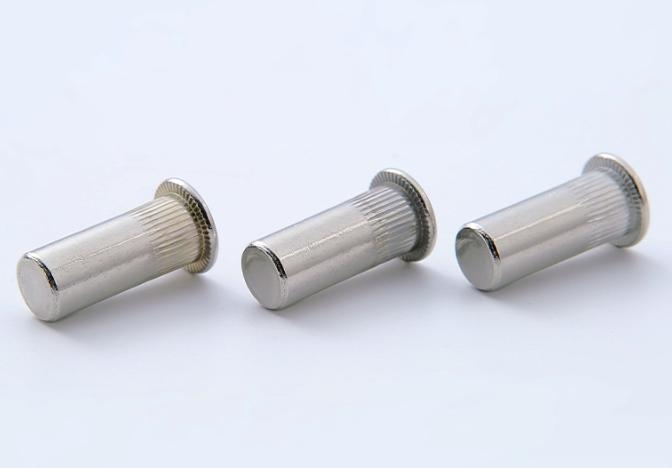
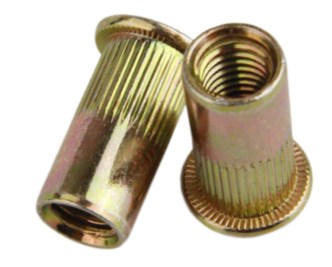
Rivet nuts, also known as threaded inserts or blind rivet nuts, are versatile fasteners used to create strong and reliable threads in materials where traditional threading methods are not feasible. Whether you’re installing or uninstalling rivet nuts, understanding the proper techniques and precautions is essential for successful outcomes. In this article, we will delve into how to install rivet nuts and how to uninstall rivet nuts, providing you with a comprehensive guide to master these processes.
How to Install Rivet Nuts and How to Uninstall Rivet Nuts
How to Install Rivet Nuts
Tools and Materials Required
Before diving into the installation process, gather the necessary tools and materials, including a drill, a suitable rivet nut installation tool (such as a hand or power tool), appropriate-sized drill bits, and the rivet nuts themselves.
Pre-Installation Preparations
To ensure a smooth installation process, take the following preparatory steps:
- Selecting the Appropriate Rivet Nut Size and Type: Consider the material thickness, load requirements, and thread size to choose the correct rivet nut.
- Marking the Installation Location: Accurately mark the spot where you intend to install the rivet nut to ensure precise placement.
Installation Steps
Follow these steps to install a rivet nut successfully:
- Drilling a Hole in the Base Material: Use a drill with a bit slightly smaller than the rivet nut’s outer diameter to create a hole in the base material.
- Inserting the Rivet Nut into the Hole: Insert the rivet nut into the drilled hole, ensuring it sits flush with the material surface.
- Applying Pressure to Expand the Rivet Nut: Utilize the appropriate installation tool to apply pressure, causing the rivet nut to expand and grip the surrounding material securely.
- Checking for Proper Installation: Verify that the rivet nut is firmly in place and can accommodate the intended fastener.
How to Uninstall Rivet Nuts
Tools and Materials Required
Before removing a rivet nut, gather the following tools and materials: a rivet nut removal tool (such as a mandrel and nosepiece set), pliers or wrenches, and safety equipment.
Pre-Uninstallation Preparations
Before beginning the uninstallation process, take the following preparatory measures:
- Identifying the Type and Size of the Rivet Nut: Determine the specific rivet nut type and size to select the appropriate removal tool and technique.
- Inspecting the Surrounding Components: Assess the surrounding components to ensure they won’t be damaged during the uninstallation process.
Uninstallation Steps
Follow these steps to remove a rivet nut:
- Removing Any Fasteners Connected to the Rivet Nut: If there are fasteners threaded into the rivet nut, remove them using pliers or wrenches.
- Applying Reverse Force to Break the Nut’s Grip: Utilize the rivet nut removal tool to apply reverse force, breaking the nut’s grip on the base material.
- Extracting the Rivet Nut from the Base Material: Once the grip is broken, gently extract the rivet nut from the hole using pliers or the removal tool.
Post-Uninstallation Considerations
After removing the rivet nut, address the following considerations:
- Inspecting the Hole for Any Damage: Assess the hole to ensure it remains intact and free from any damage caused during the uninstallation process.
- Repairing or Replacing the Hole if Necessary: If the hole is damaged or no longer suitable for the application, repair it using appropriate methods or consider replacing the entire component.
Common Challenges and Tips for How to Install Rivet Nuts and How to Uninstall Rivet Nuts
- Overcoming Resistance During Installation or Uninstallation
If you encounter resistance during either process, apply gentle pressure and ensure that you are using the correct tools and techniques. Avoid excessive force, as it can lead to damage or improper installation/uninstallation.
- Dealing with Damaged or Stripped Rivet Nuts
In cases where the rivet nut is damaged or stripped, it may be challenging to remove or reinstall. Consider using specialized extraction tools or techniques, such as using a drill bit to remove the damaged nut. For reinstallation, explore alternatives like helical coil inserts or repairing the damaged threads before inserting a new rivet nut.
- Ensuring Proper Alignment and Torque During Installation
To achieve optimal results, ensure proper alignment between the rivet nut, the hole, and the mating component. Misalignment can result in weakened threads or difficulty in fastening. Additionally, pay attention to the torque applied during installation to avoid overtightening, which can cause thread deformation or failure.
- Using Lubricants or Adhesives for Smoother Installation or Uninstallation
In certain scenarios, lubricants or adhesives can aid in the installation or uninstallation process. Lubricants can reduce friction, making it easier to insert or remove the rivet nut. Adhesives, such as thread-locking compounds, can enhance the nut’s stability and prevent loosening over time.
Safety Considerations for How to Install Rivet Nuts and How to Uninstall Rivet Nuts
- Wearing Appropriate Personal Protective Equipment
When engaging in rivet nut installation or uninstallation, wear safety goggles, gloves, and appropriate clothing to protect yourself from flying debris, sharp edges, and potential injuries.
- Using Caution When Drilling and Applying Force
Exercise caution while drilling holes to avoid accidental slips or injuries. Apply force evenly and steadily during installation or uninstallation to prevent sudden movements that could cause harm.
- Avoiding Damage to Surrounding Components or Structures
Be mindful of the surrounding components or structures while installing or uninstalling rivet nuts. Take precautions to protect them from accidental damage, such as using masking tape or protective covers.
Conclusion
Mastering the art of rivet nut installation and uninstallation is a valuable skill for various applications. By following the outlined steps and considering the provided tips and safety measures, you can ensure successful outcomes while maintaining safety and efficiency. Remember to choose the appropriate tools, inspect the materials, and proceed with care, resulting in reliable and durable fastenings or removals. With this comprehensive guide, you’re now equipped to tackle rivet nut installation and uninstallation projects with confidence.